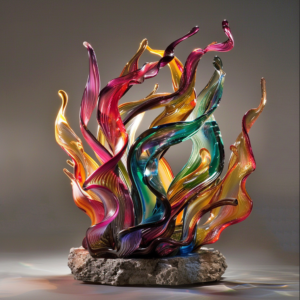
The fiery dance of molten glass and the skilled movements of the artist – these elements define the captivating art of glass sculpting. Transforming molten fire into breathtaking sculptures demands not only artistic vision but also a mastery of specialized tools and equipment. Let’s embark on a journey through the essential toolkit of a glass sculptor, equipping you with the knowledge to create your own masterpieces.
The Heart of the Studio: The Furnace
The furnace is the heart of any glass sculpting studio. It provides the intense heat required to melt raw glass (called cullet) into a workable state. Furnaces come in various sizes and fuel types, with propane and electric models being the most common. The ideal furnace for you will depend on your studio space, budget, and the size and complexity of your desired sculptures.
Shaping the Molten Muse: The Essential Hand Tools
- Blowpipe: This hollow pipe is the glassblower’s primary tool. By blowing air through the blowpipe, a gather (a mass of molten glass) is inflated into a bubble, forming the base for shaping.
- Gathering Tools: Punty rods and jacks are used to gather molten glass from the furnace and manipulate its form during sculpting. These tools allow for safe handling of the hot glass and precise placement during the shaping process.
- Shaping Tools: Paddles, spoons, chisels, and various other tools come into play once the gather is formed. These tools allow for refining the shape of the bubble, creating indentations, adding texture, and manipulating the form into your desired artistic vision.
Maintaining Control: Essential Equipment
- Glory Hole: This furnace compartment provides a concentrated heat source. As the glass cools and begins to stiffen, the glory hole allows for reheating specific areas to maintain workability and facilitate further shaping.
- Marver: This is a large, smooth slab used for rolling hot glass to even out its thickness and texture.
- Annealing Kiln: Once your glass sculpture is shaped, it’s crucial to cool it slowly in a controlled environment (annealing kiln) to prevent cracking from thermal stress.
Additional Tools for Specialized Techniques
As you progress in your glassblowing journey, you may encounter techniques that require additional equipment:
- Molds: For specific shapes, pre-made molds can be used in conjunction with freehand manipulation.
- Color Frit and Glass Rods: These allow for incorporating colored elements into your sculptures.
- Safety Equipment: Working with molten glass requires proper protection. This includes heat-resistant gloves, safety glasses, and a respirator.
Choosing the Right Tools:
Selecting the right tools depends on your experience level, artistic vision, and budget. Starting with a basic toolkit and gradually expanding it as you develop your skills is a wise approach. Consider taking classes from experienced glassblowers to gain hands-on experience and learn about the proper use and care of these specialized tools.
Conclusion: A Gateway to Artistic Expression
The world of glass sculpting awaits your exploration. With the right tools and equipment, coupled with dedication and artistic vision, you can transform molten glass into captivating masterpieces. Remember, the journey is just as important as the destination. Embrace the learning process, experiment with different techniques, and let the magic of glass sculpting ignite your creative spirit.


